Smart Home Information Terminal
I always wanted to be able to control stuff in my home, and for a bunch of things I can — I have command line access to things like the music selection, the telephone call log, the Outside Deck LED Lights, and so on.
My initial “extra” thing that I wanted was a programmable thermostat; but of course I didn't want to go out and buy one. So I thought about it, and decided that it would need to be a little Raspberry-Pi based unit, possibly with a touchscreen for programming. Of course, once I went down the “with a touchscreen” path, the inevitable feature creep started.
Thus was born the Smart Home Information Terminal; a 7" LCD touchpad, Raspberry-Pi powered, with a custom GUI that I wrote myself in C++ based on SDL.
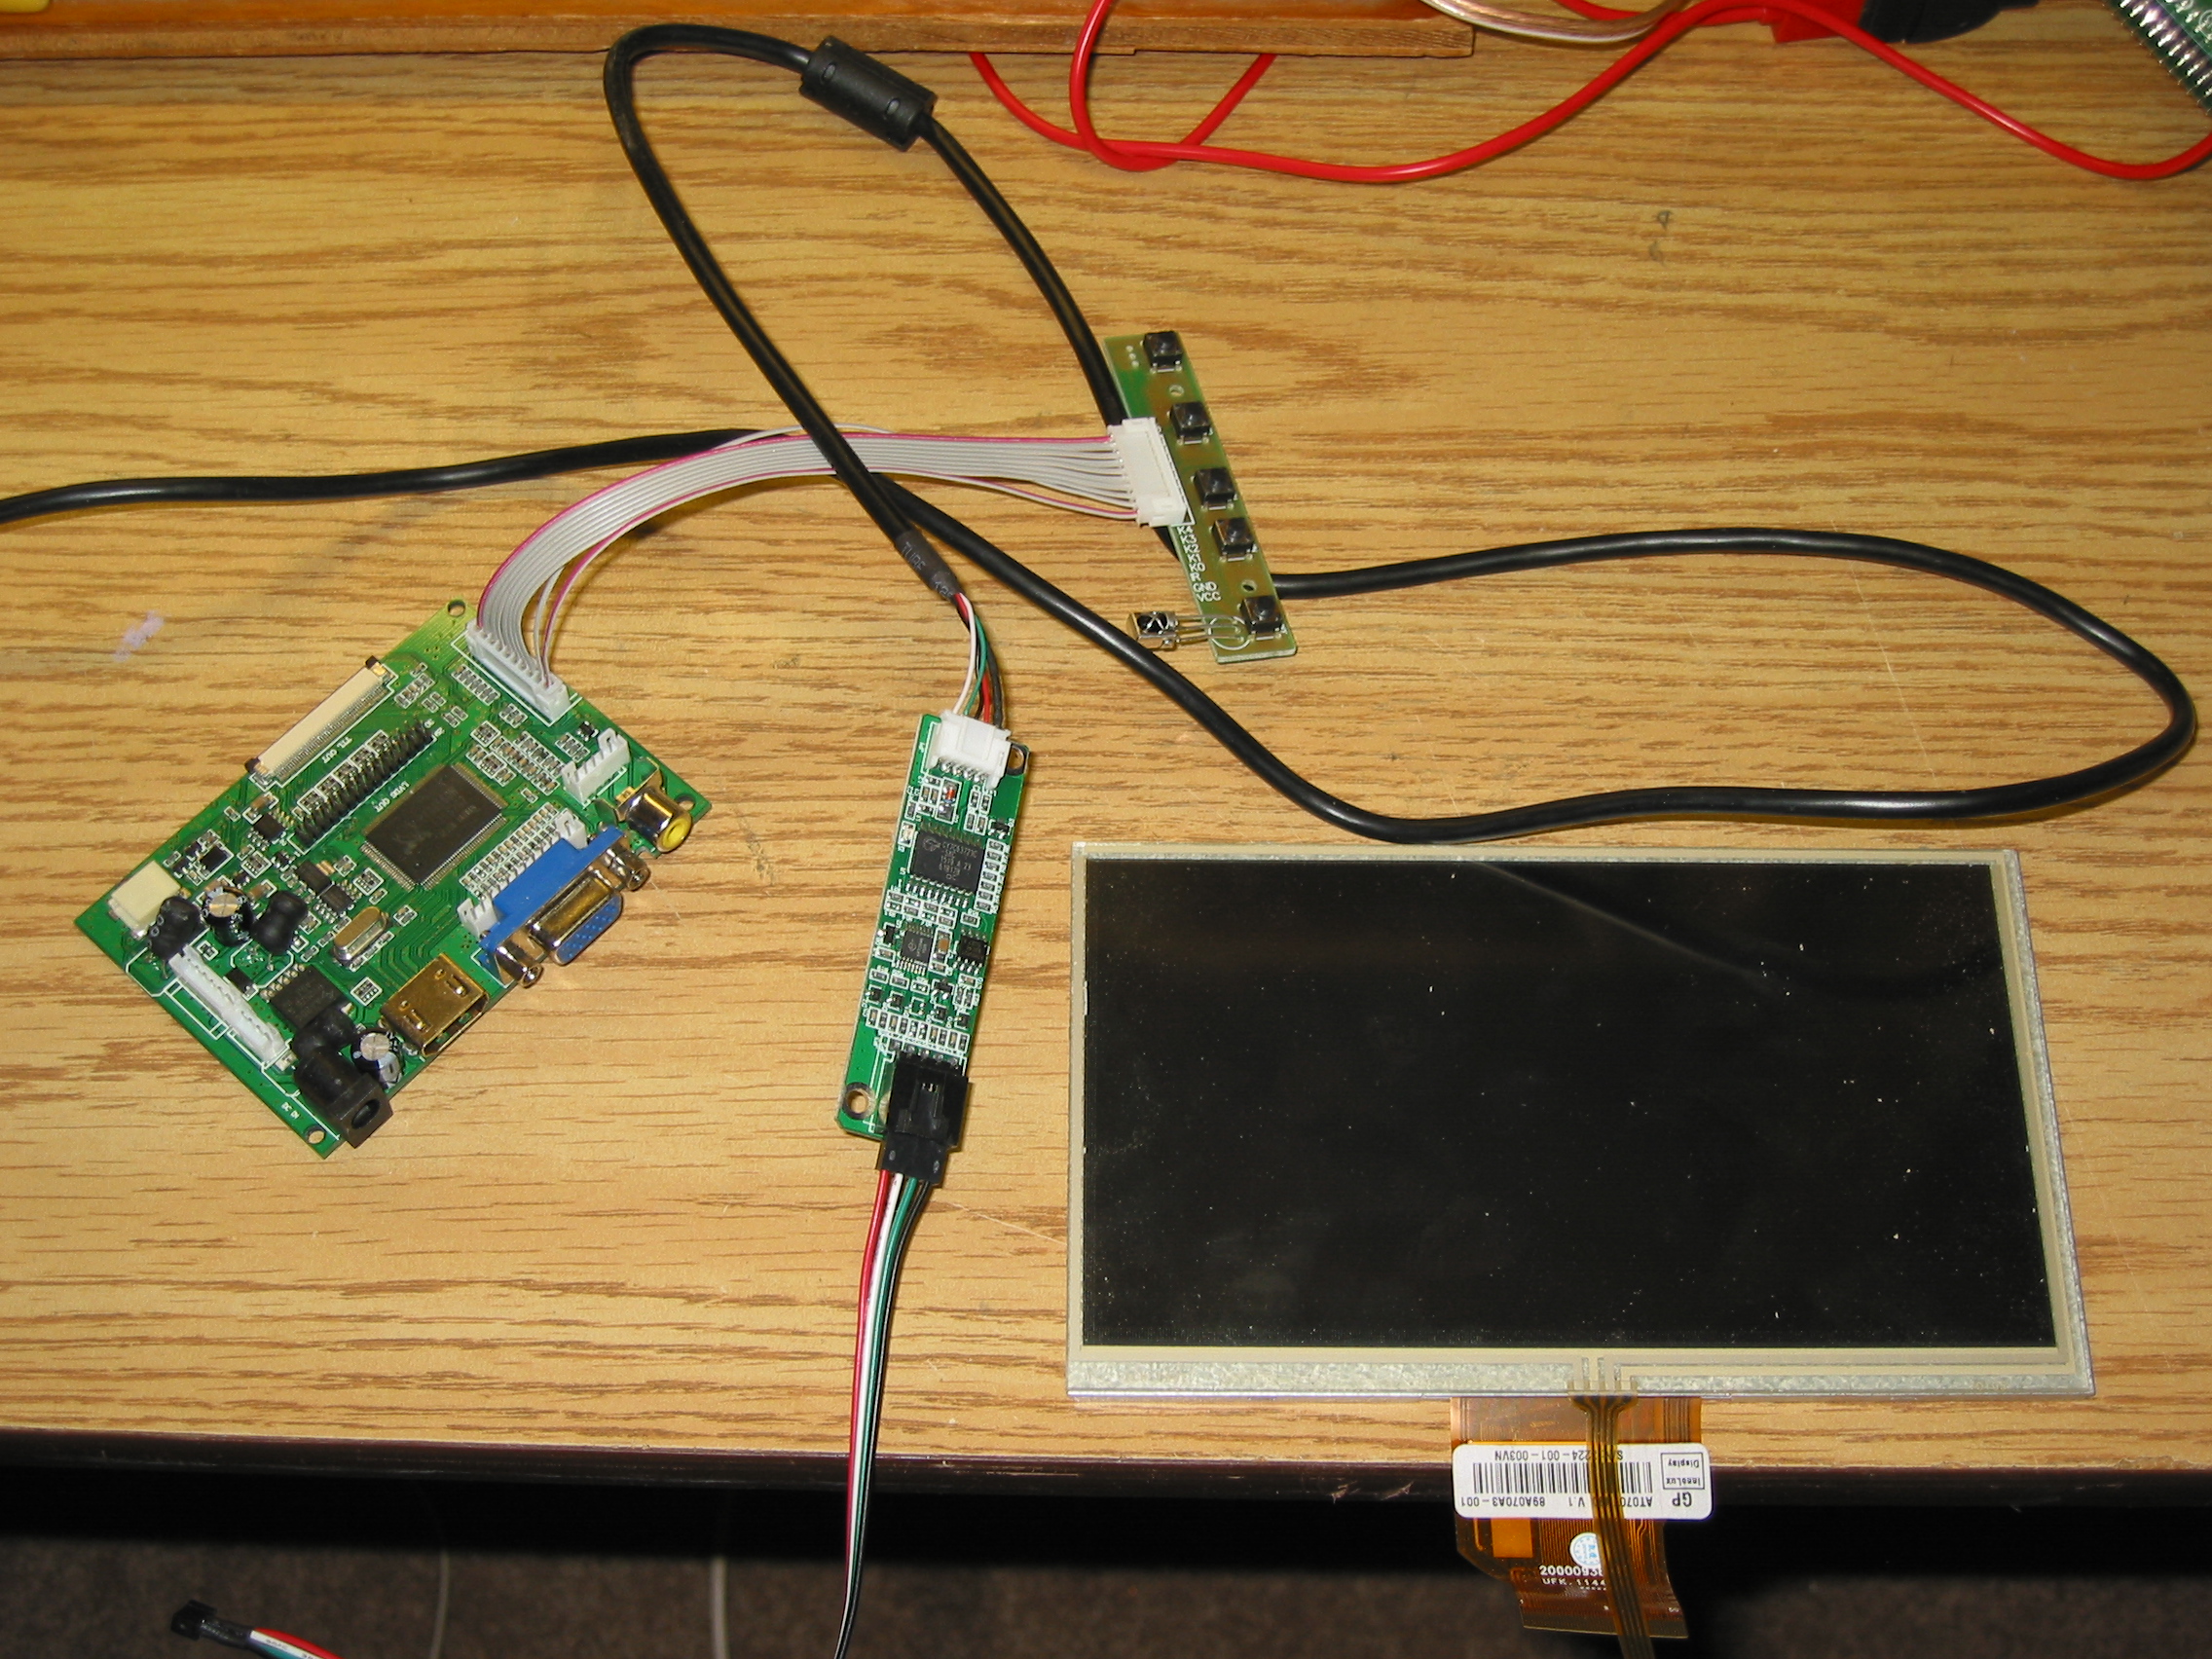
The hardware was actually relatively simple; eBay provided, for CAD$60 or so, a 7" LCD with touch screen interface and controller. The controller takes HDMI, SVGA, and baseband video in, and the whole thing runs off 12VDC (taking about an amp, so 12W of power). The touch controller presents as a USB mouse, so was trivial to get running with the Pi.
The hard part for me was building the frame, and designing the software.
Building the Frame
I'm cursed as far as woodworking goes. I can measure five times and still end up cutting three or four times. I don't know what it is, but admitting it is the first step of the program.
The first thing I needed to do was to find a way to mount the LCD panel.
It's 5mm thick, and doesn't have any mounting points on it, most annoying!
So I decided that perhaps the best way to mount it would be to create a picture frame, like the LCD picture frames you see at the stores. After spending about 45 minutes at the local Home Depot, I found a nice piece of molding that had a 5mm inset, perfect for resting the display against. It took many attempts to cut it at “exactly” 45° — even though I have a manual saw with an adjustable angle and a “click” at 45° it didn't quite work out.
Anyway, I cheated — I cut it at whatever the angle was (say 47°) and then put it into the 45° joining jig, and
recut between the two pieces.
This gave me 45° — like I said, I cut multiple times :-(
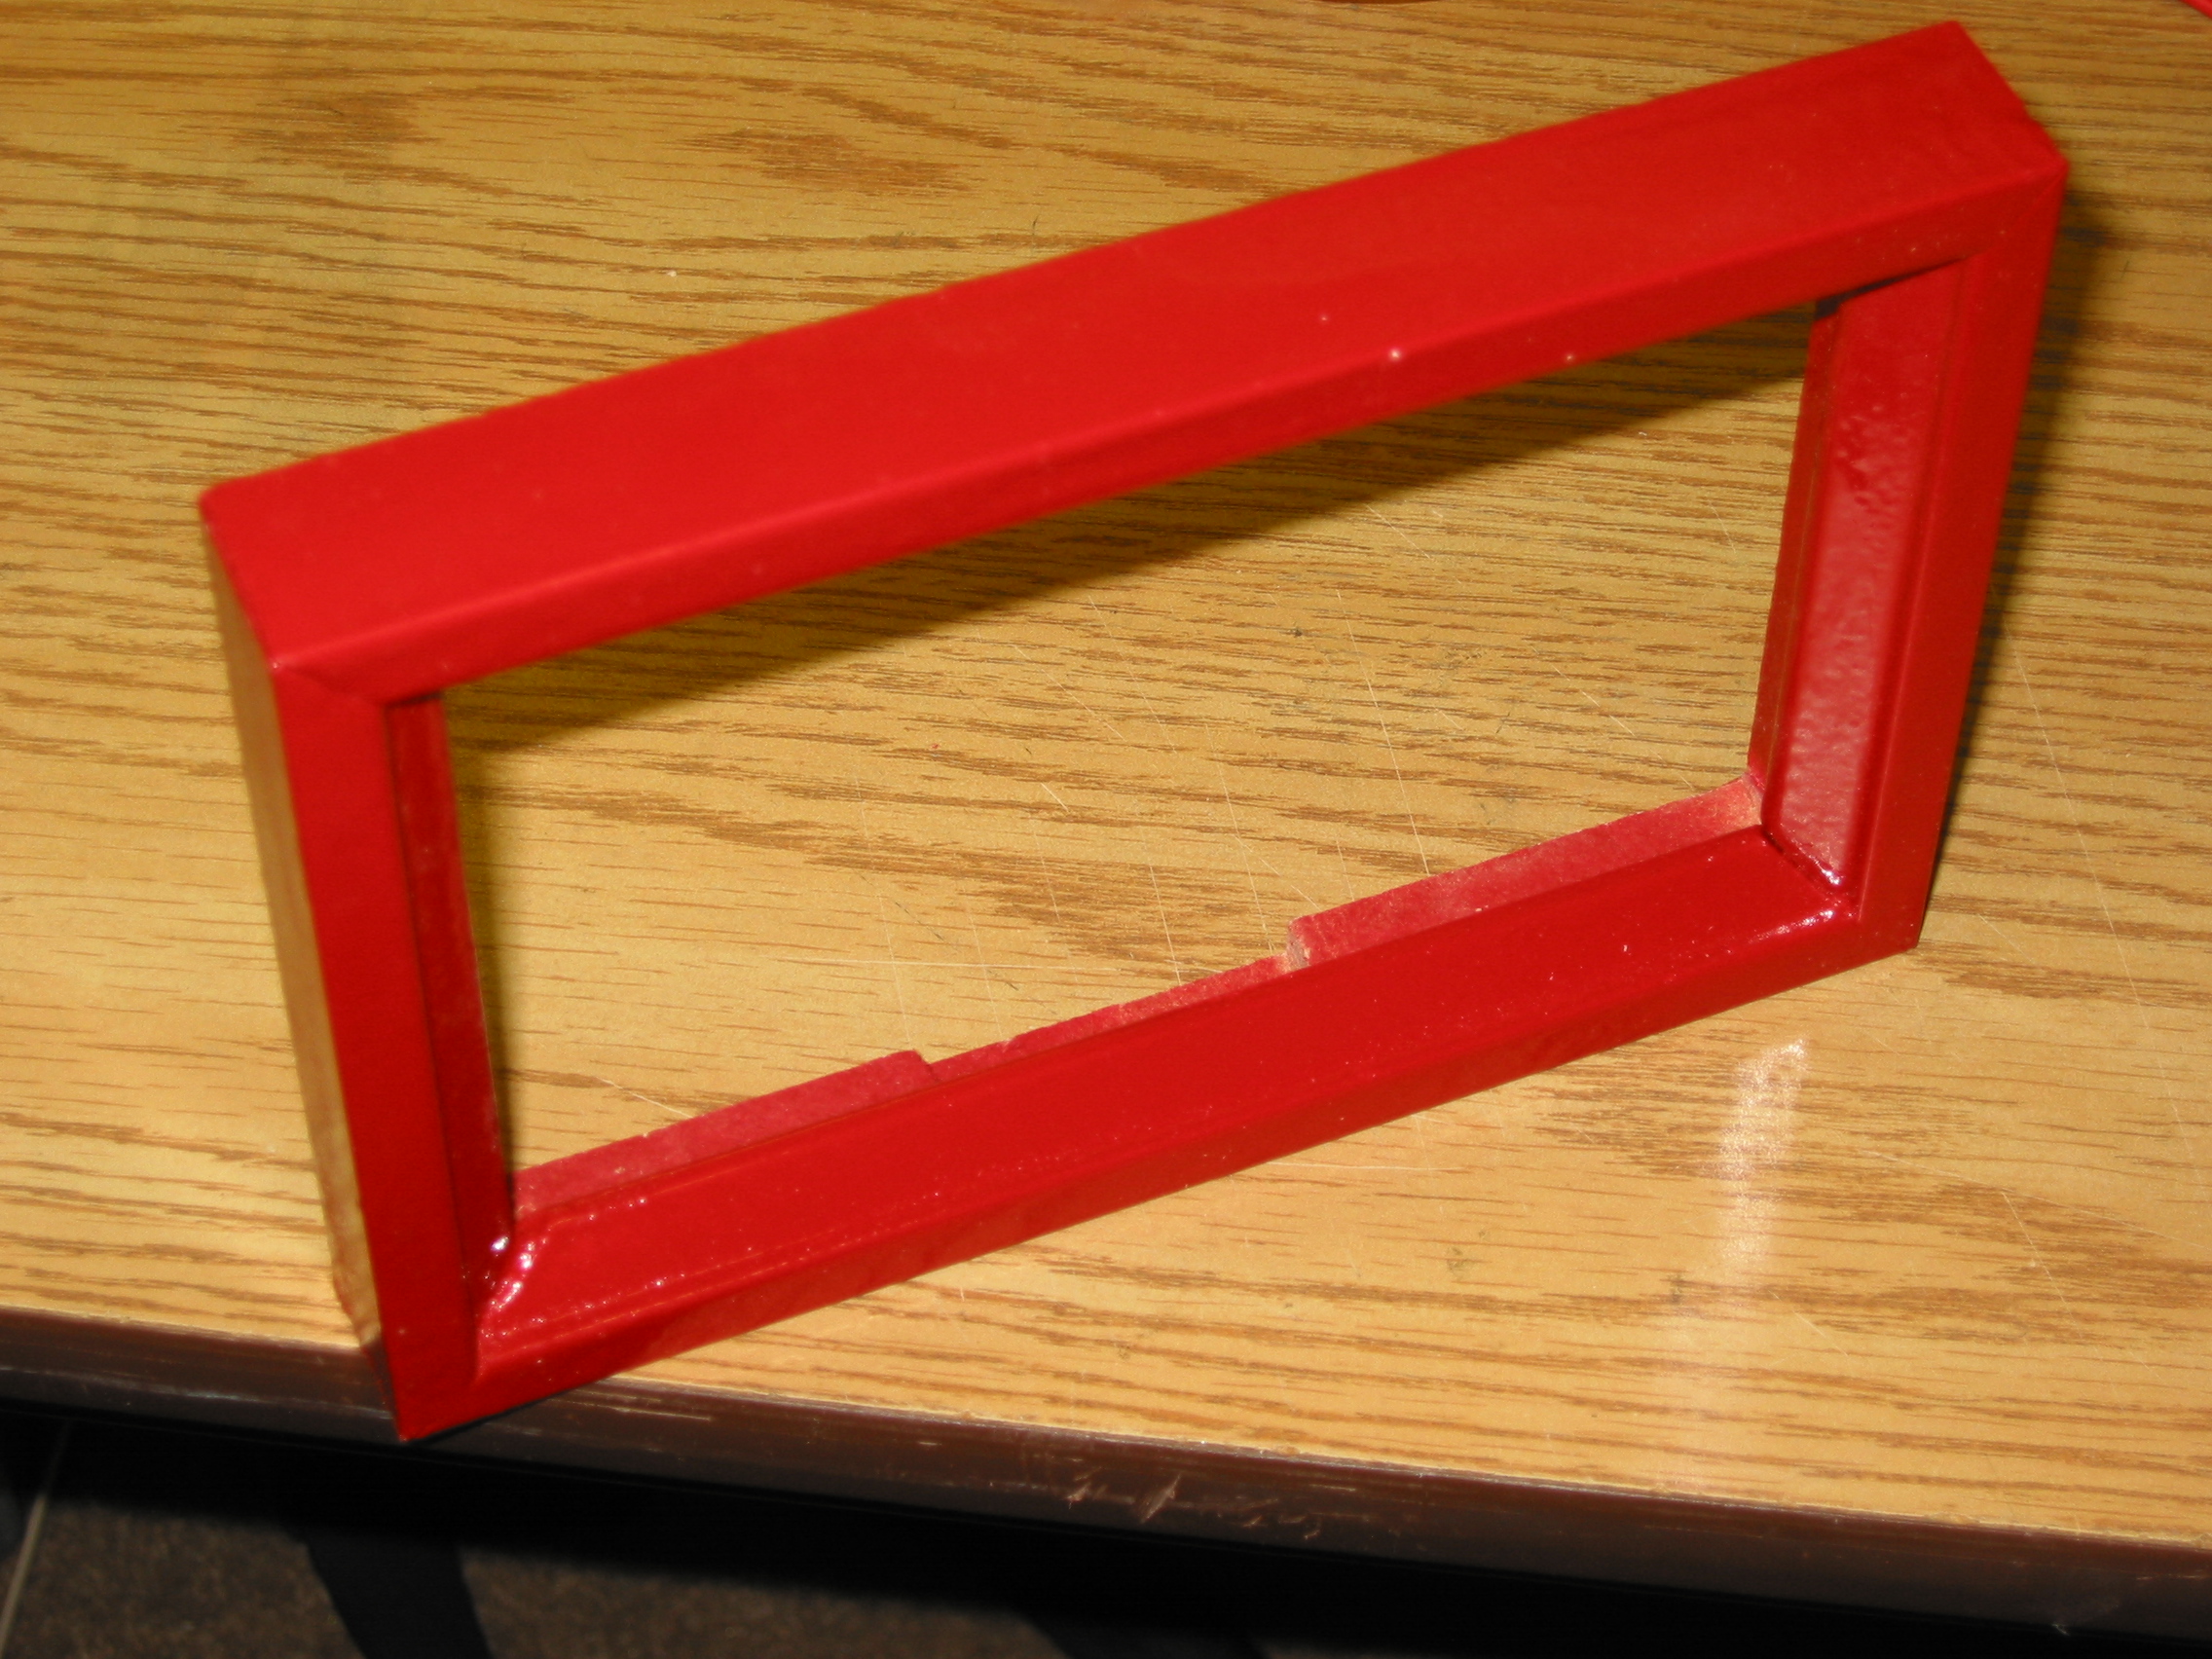

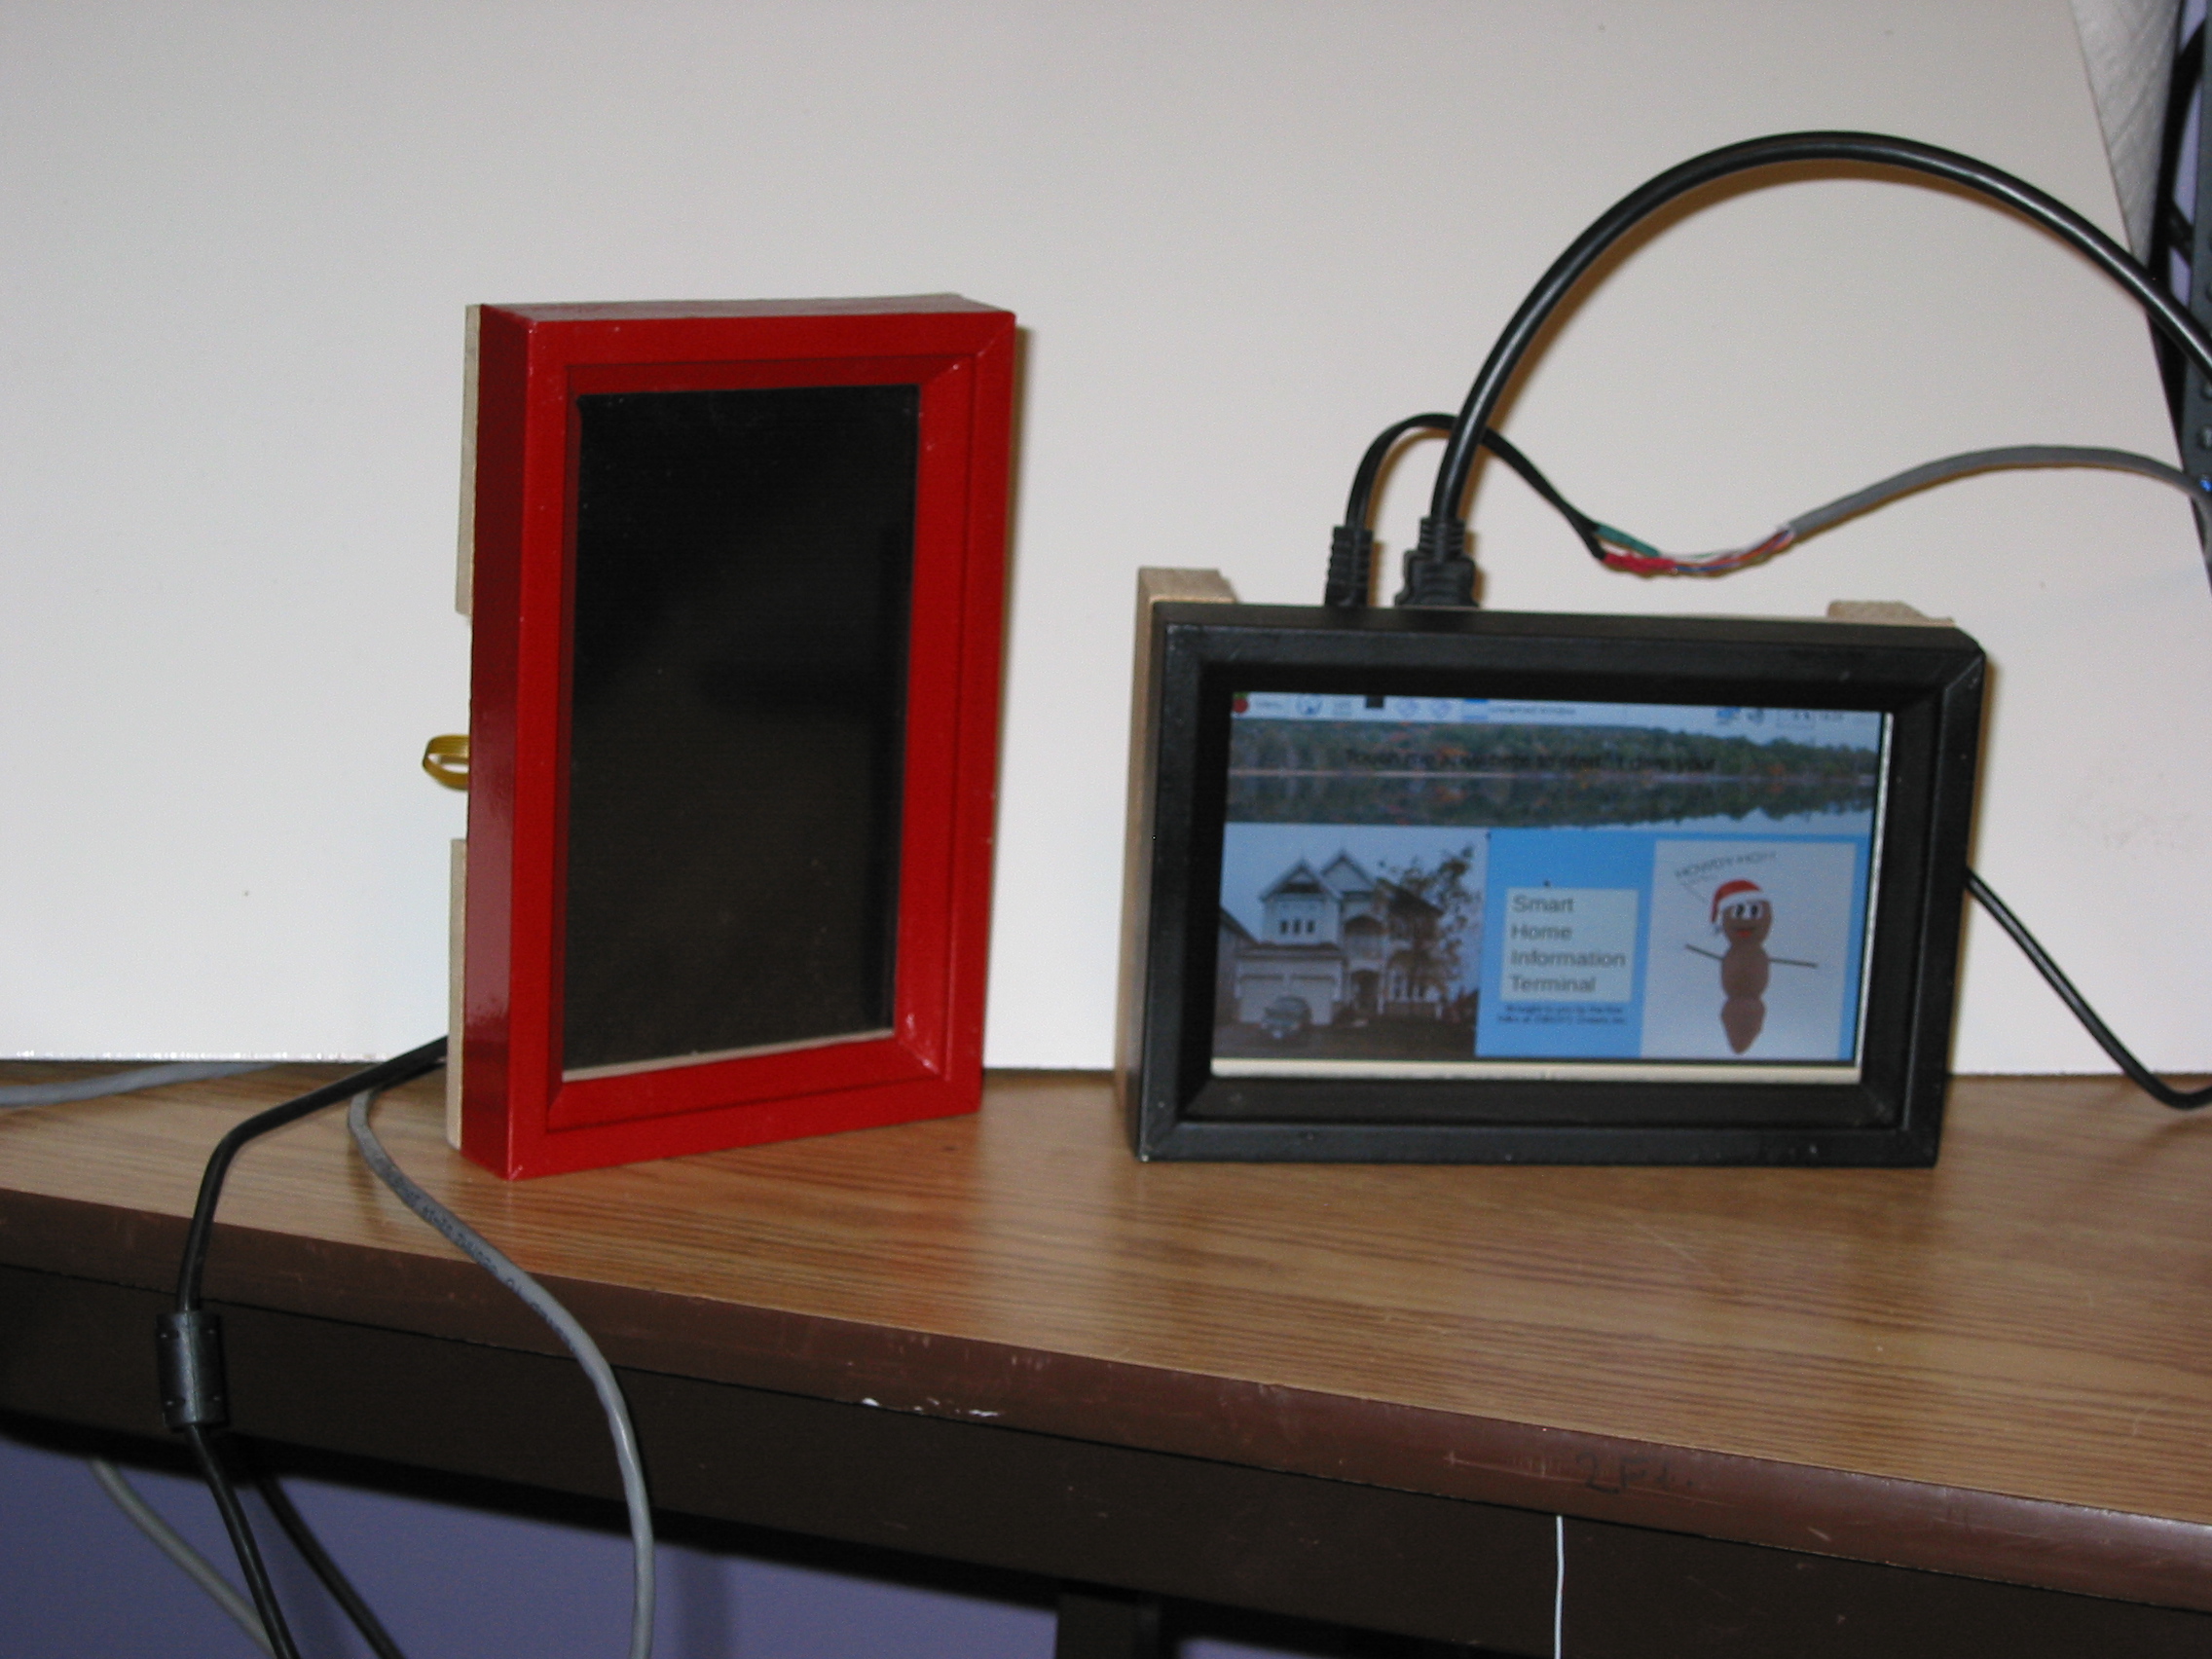
I bought two LCD monitors from eBay, figuring I'd have a development one and a deployed one.
So there's a red frame and a black frame.
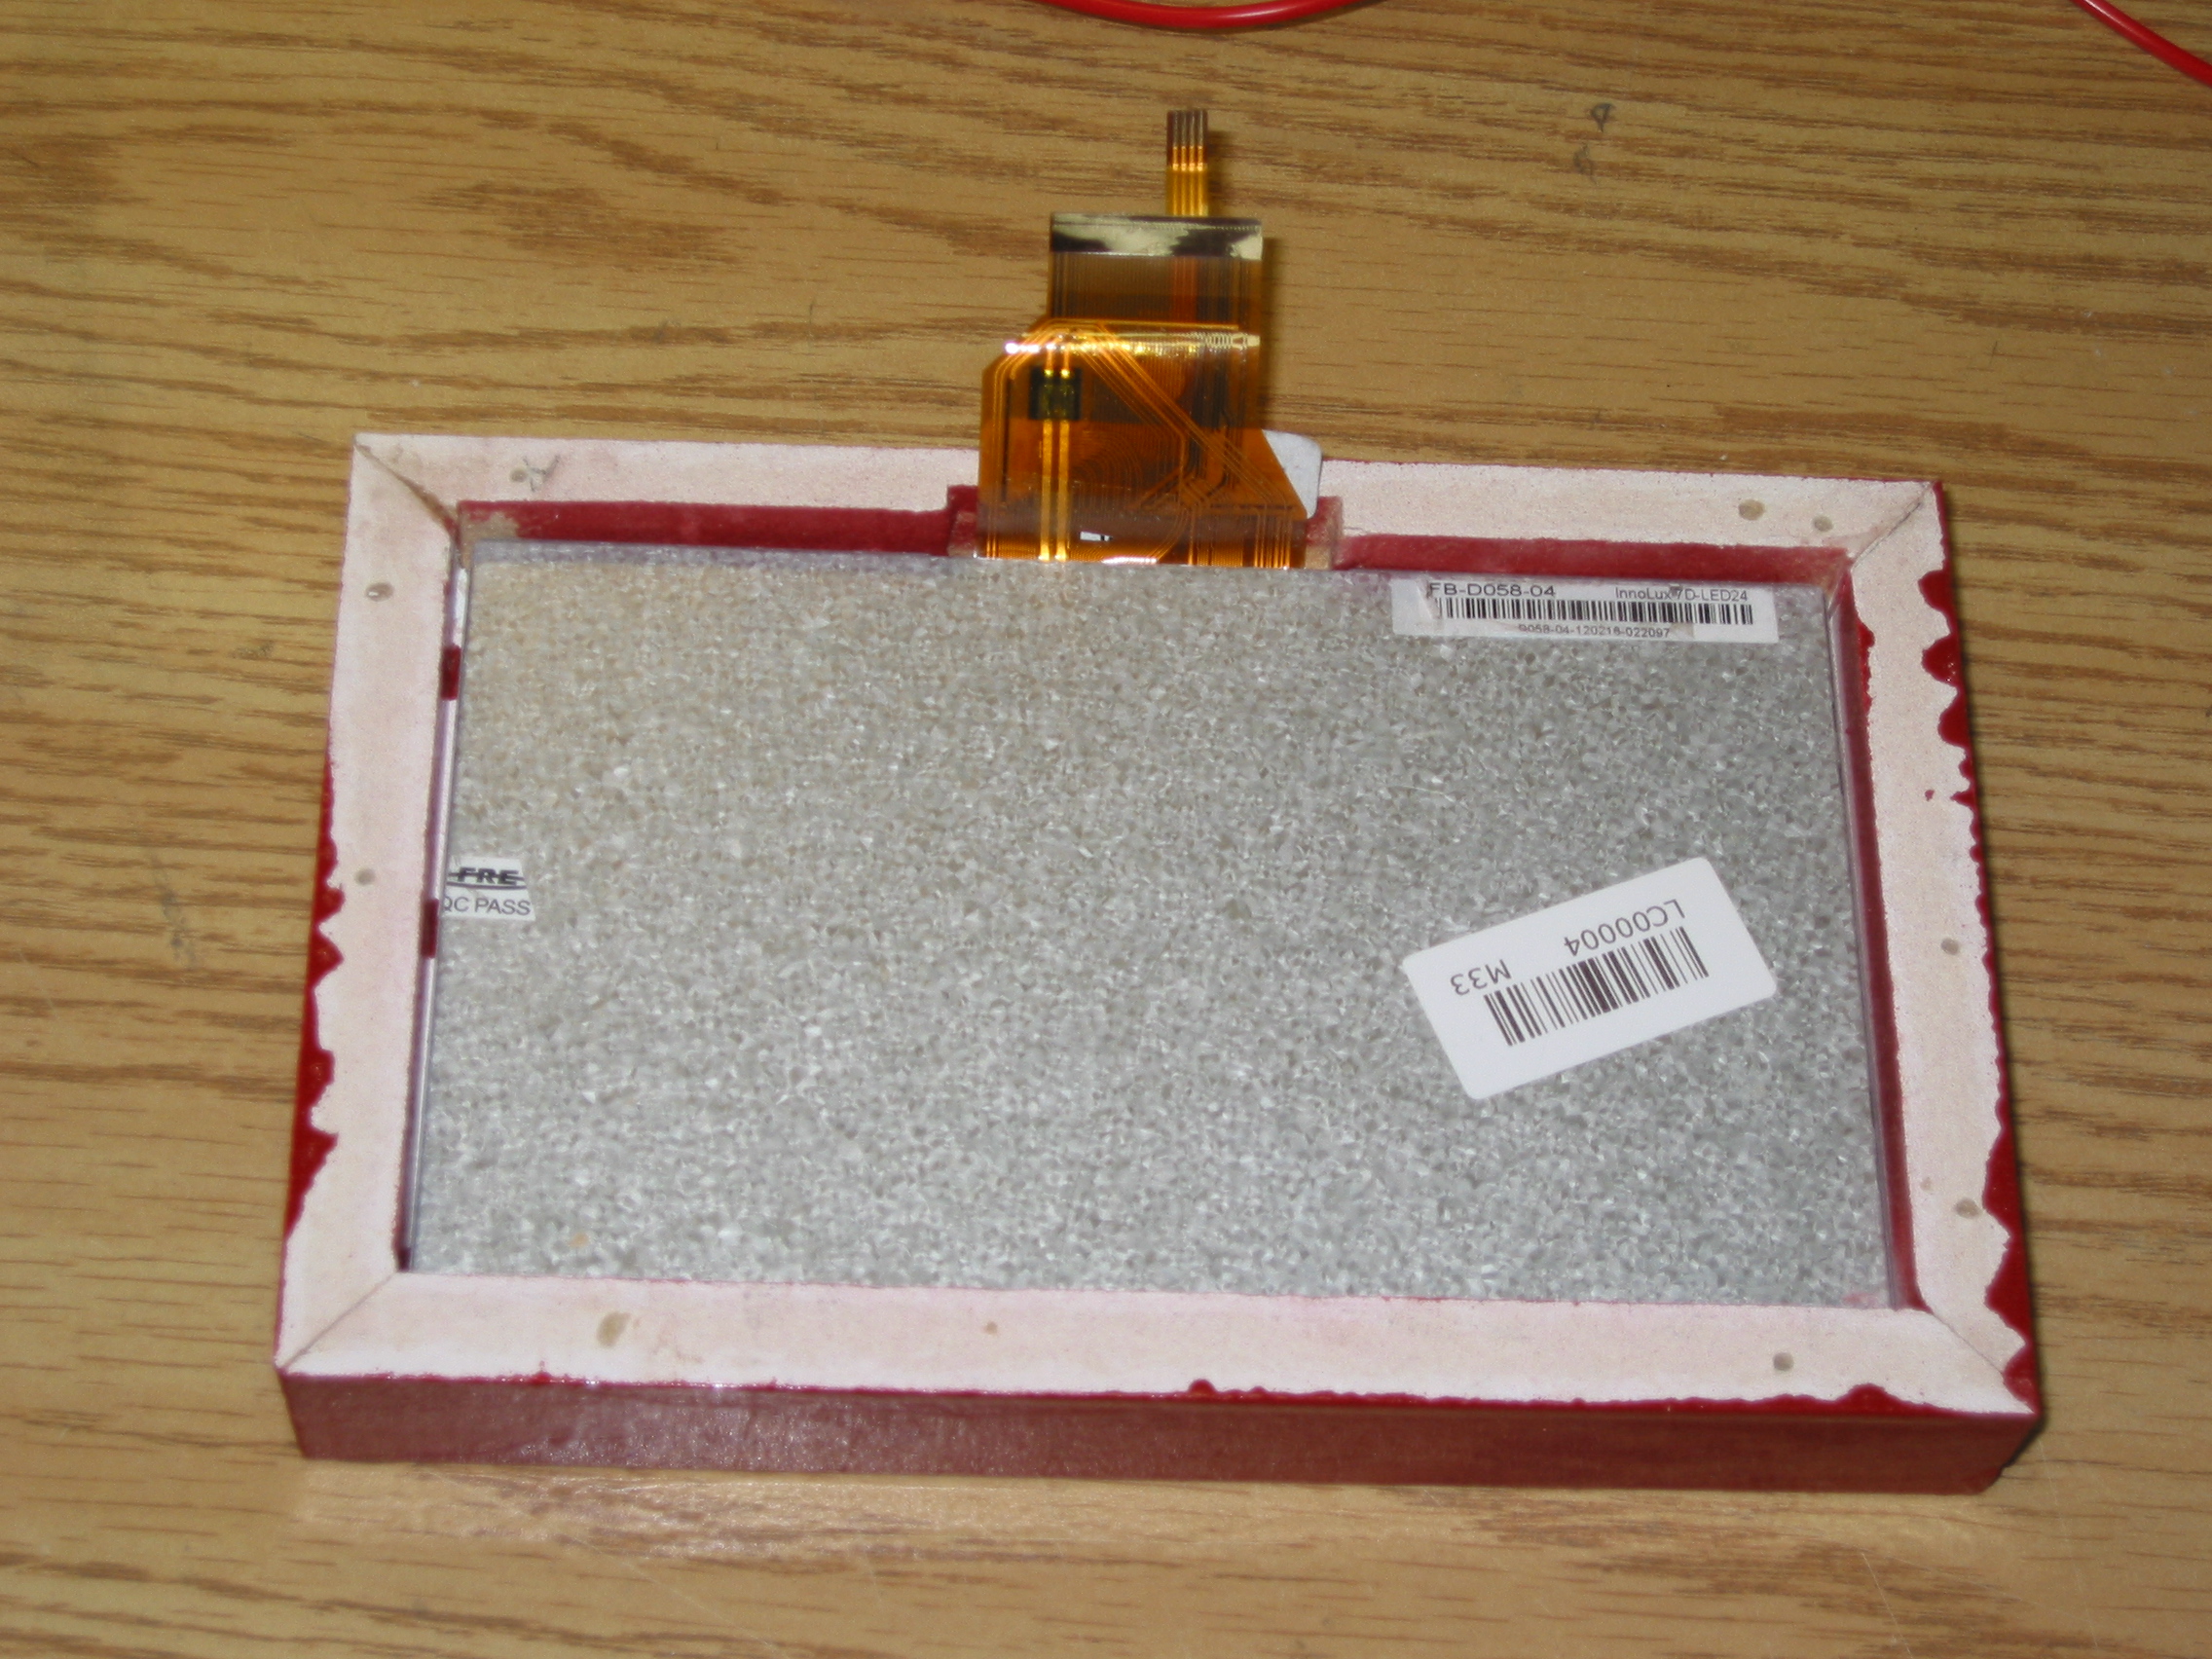
As you can see, the LCD fits snuggly into the frame:
Next, I found a composite panel at Home Depot that was exactly the right thickness to hold the LCD in place:

I cut another piece of the composite panel to fit over the other panel and the edge of the frame, and drilled
some mounting holes for the hardware, to be used with #4 screws:

The outer frame, this time out of 1" x 2" (and switching to the black frame):
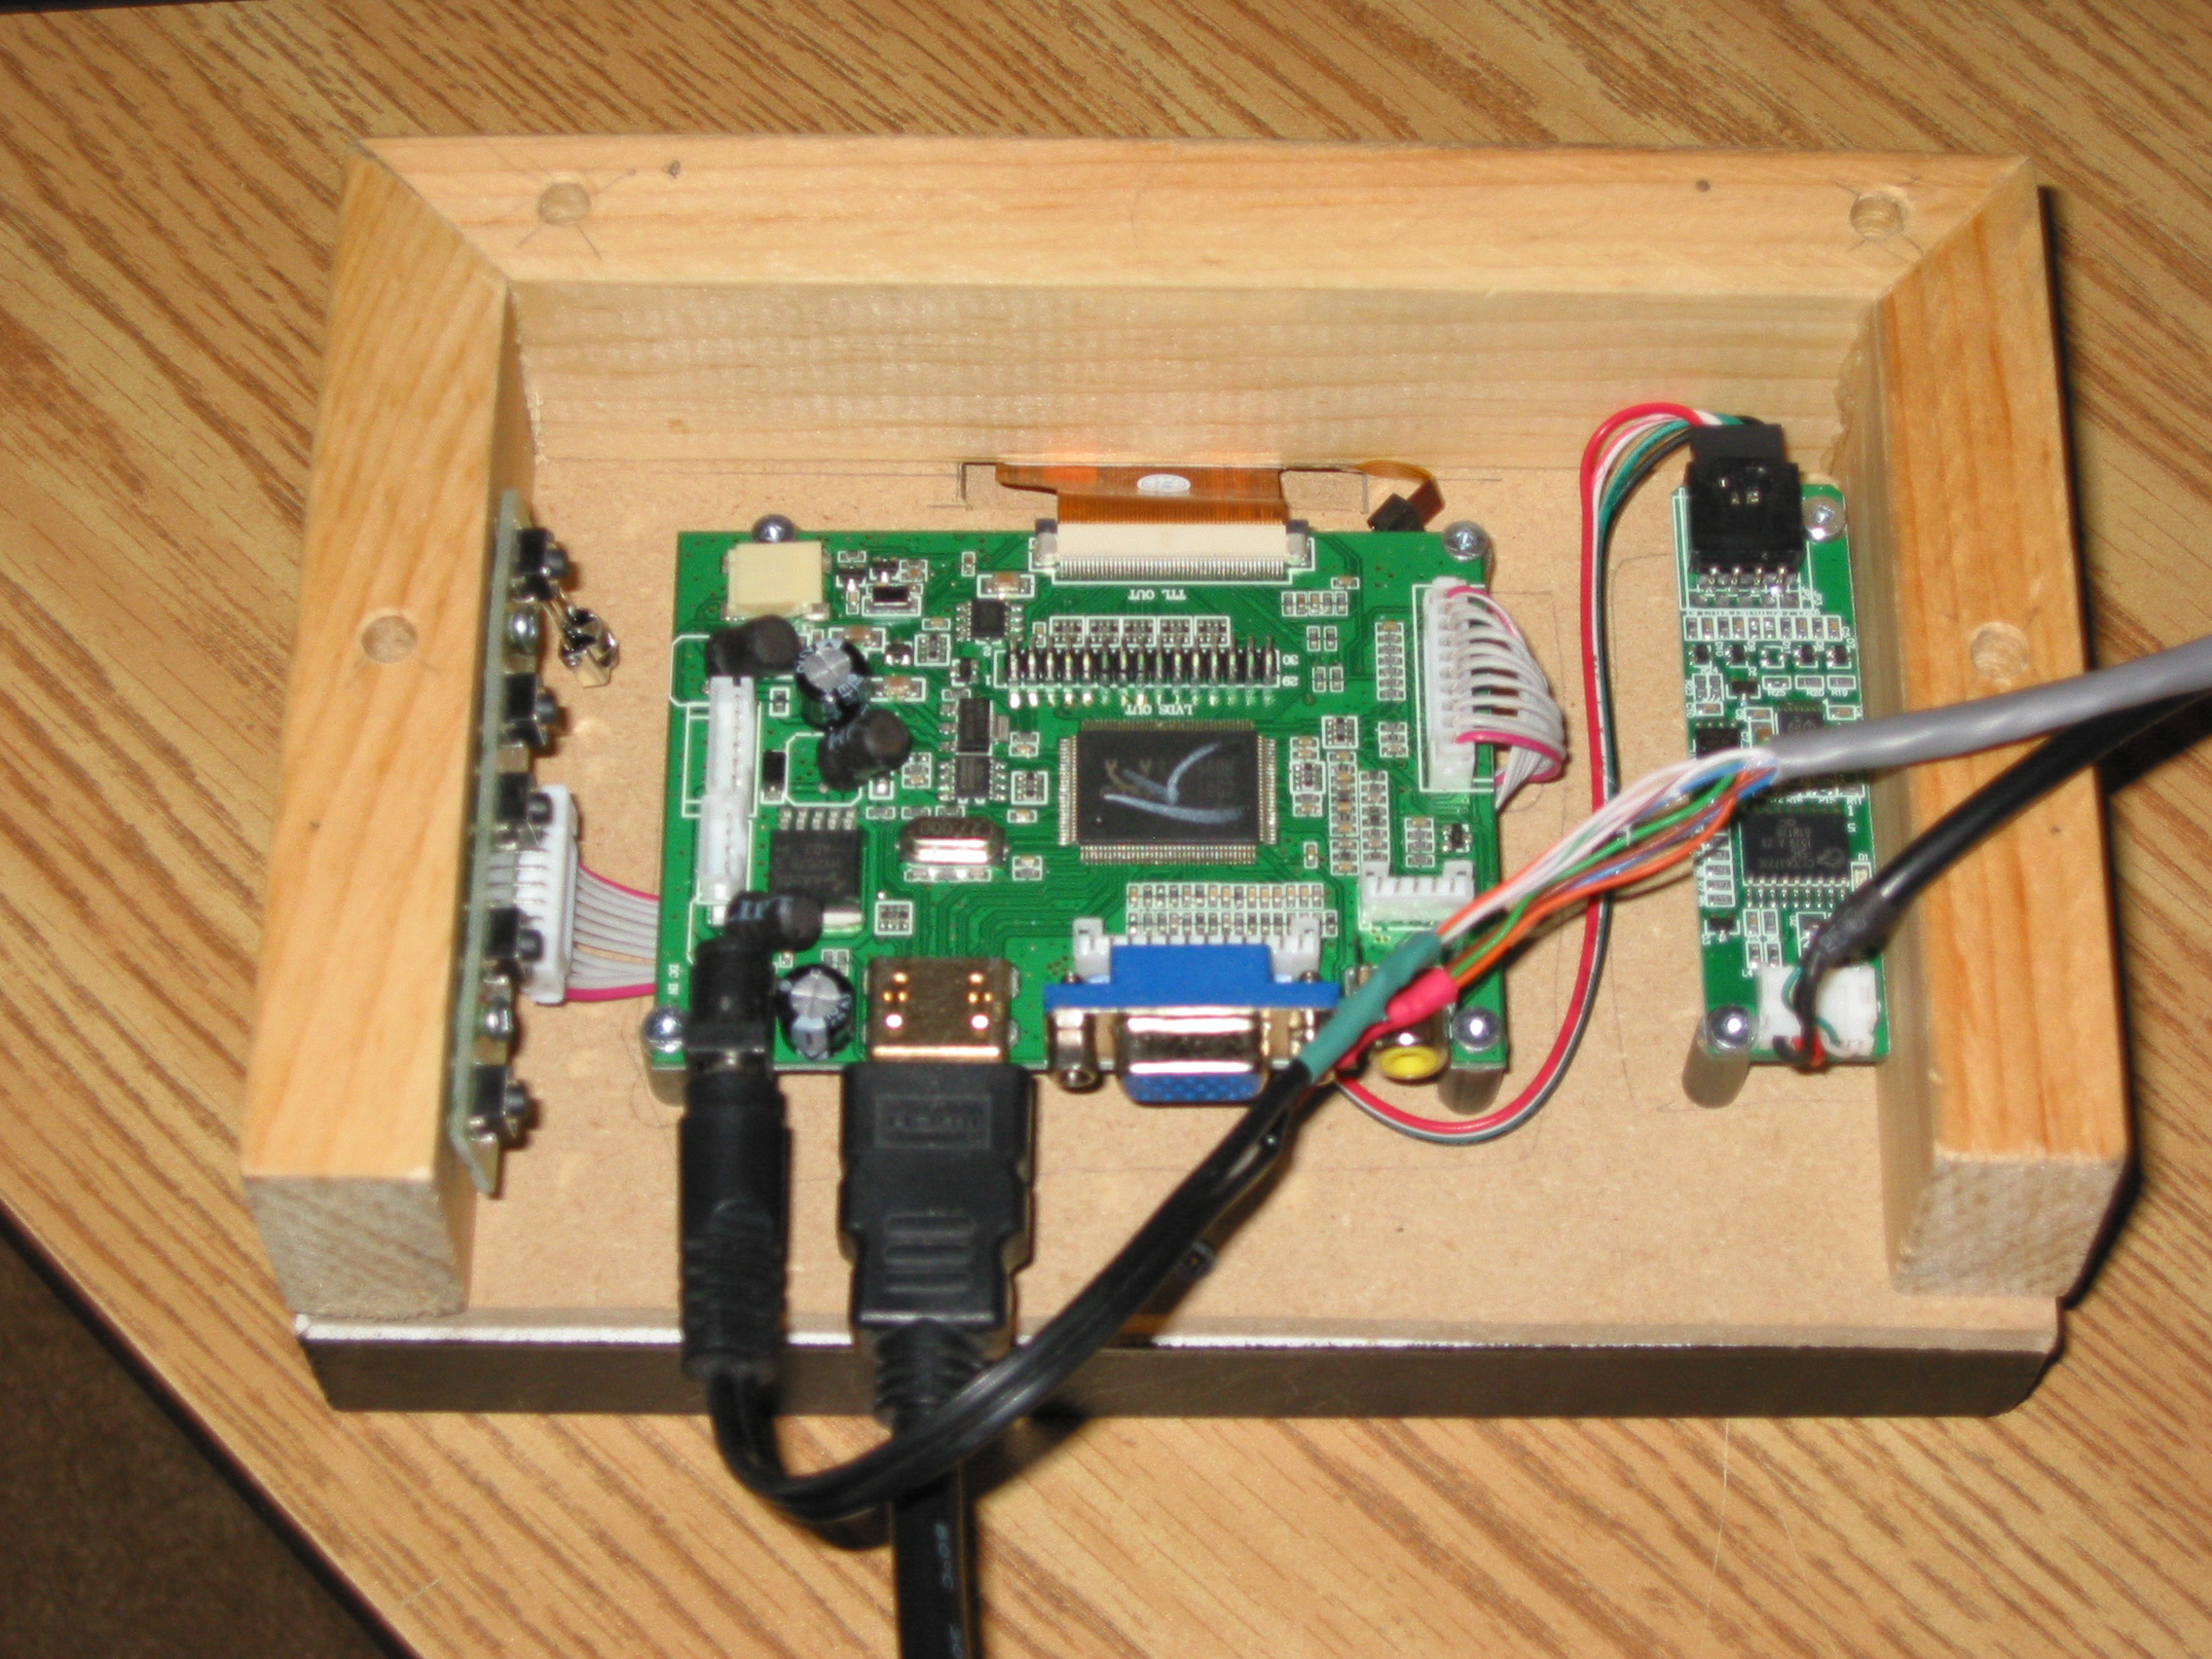
Yields the finished products:
The Software
Let me first show you some screenshots of the various menus:
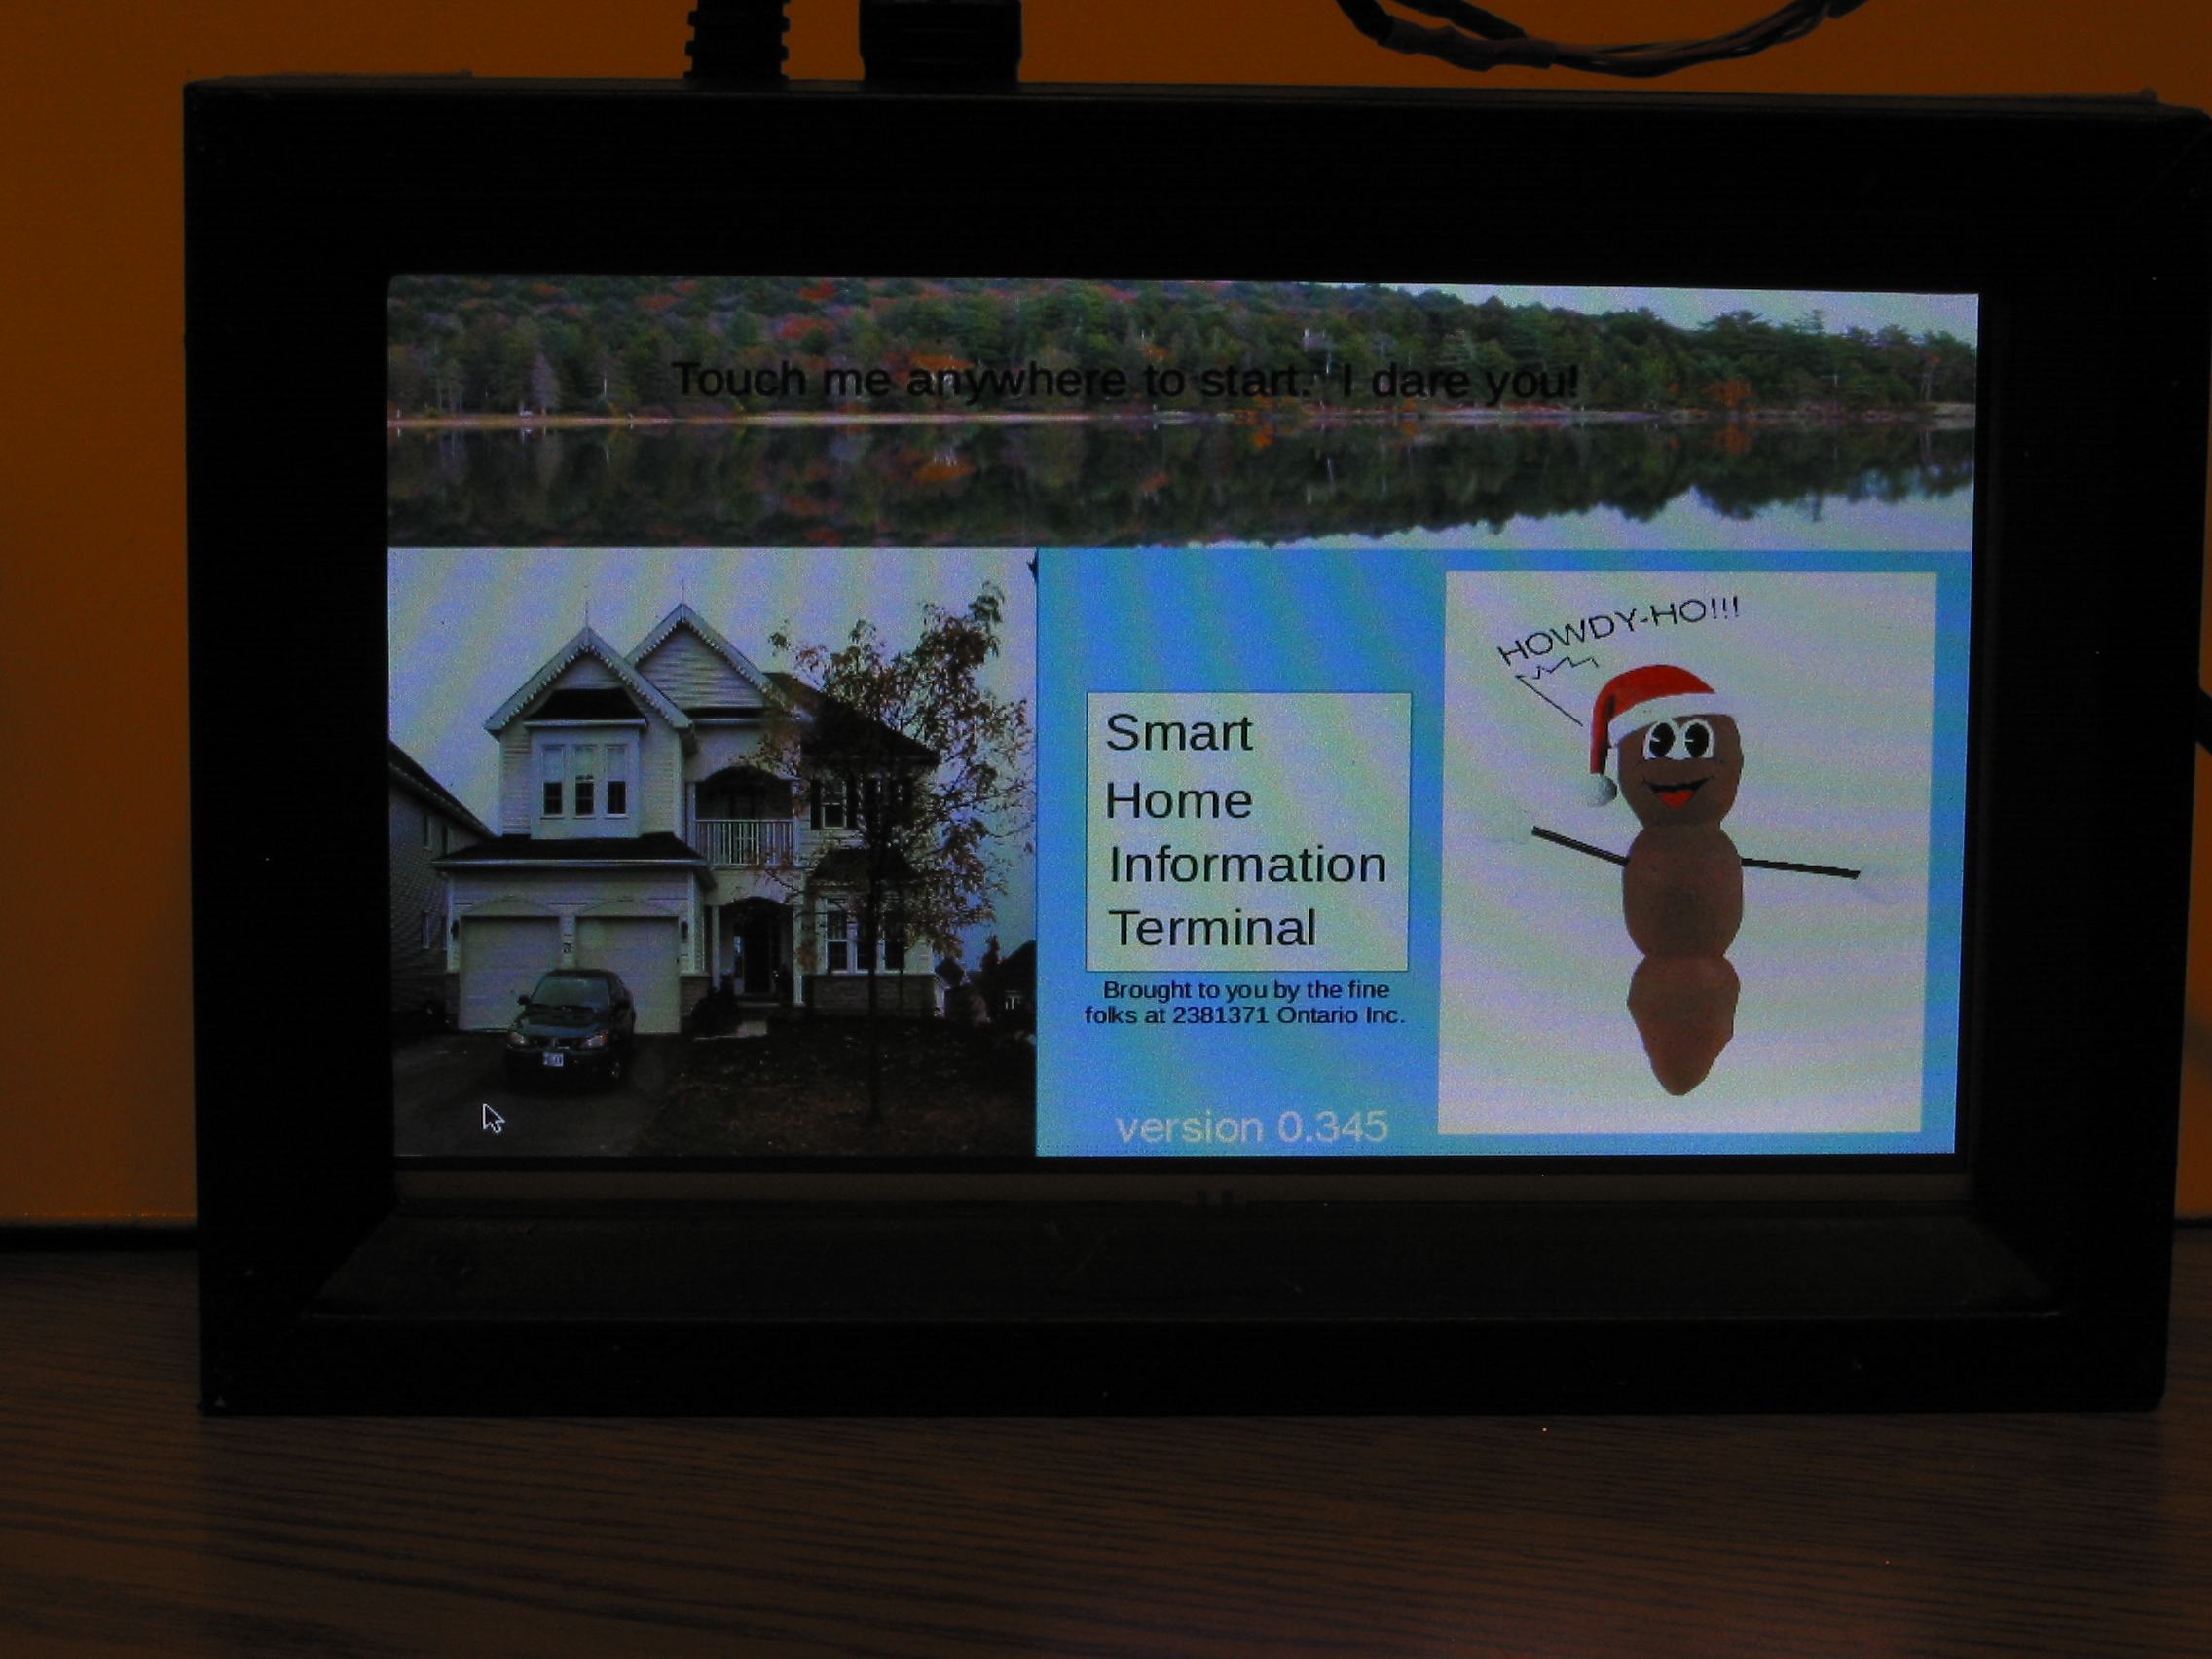
The splashscreen shown above appears whenever the system comes out of sleep mode, or when it times out on lack of user input.
Pressing the screen anywhere brings up the main menu:

You can now see the extent of the feature creep.
Looking at some of the menus, like the song selection one (I'm the most proud of this one):
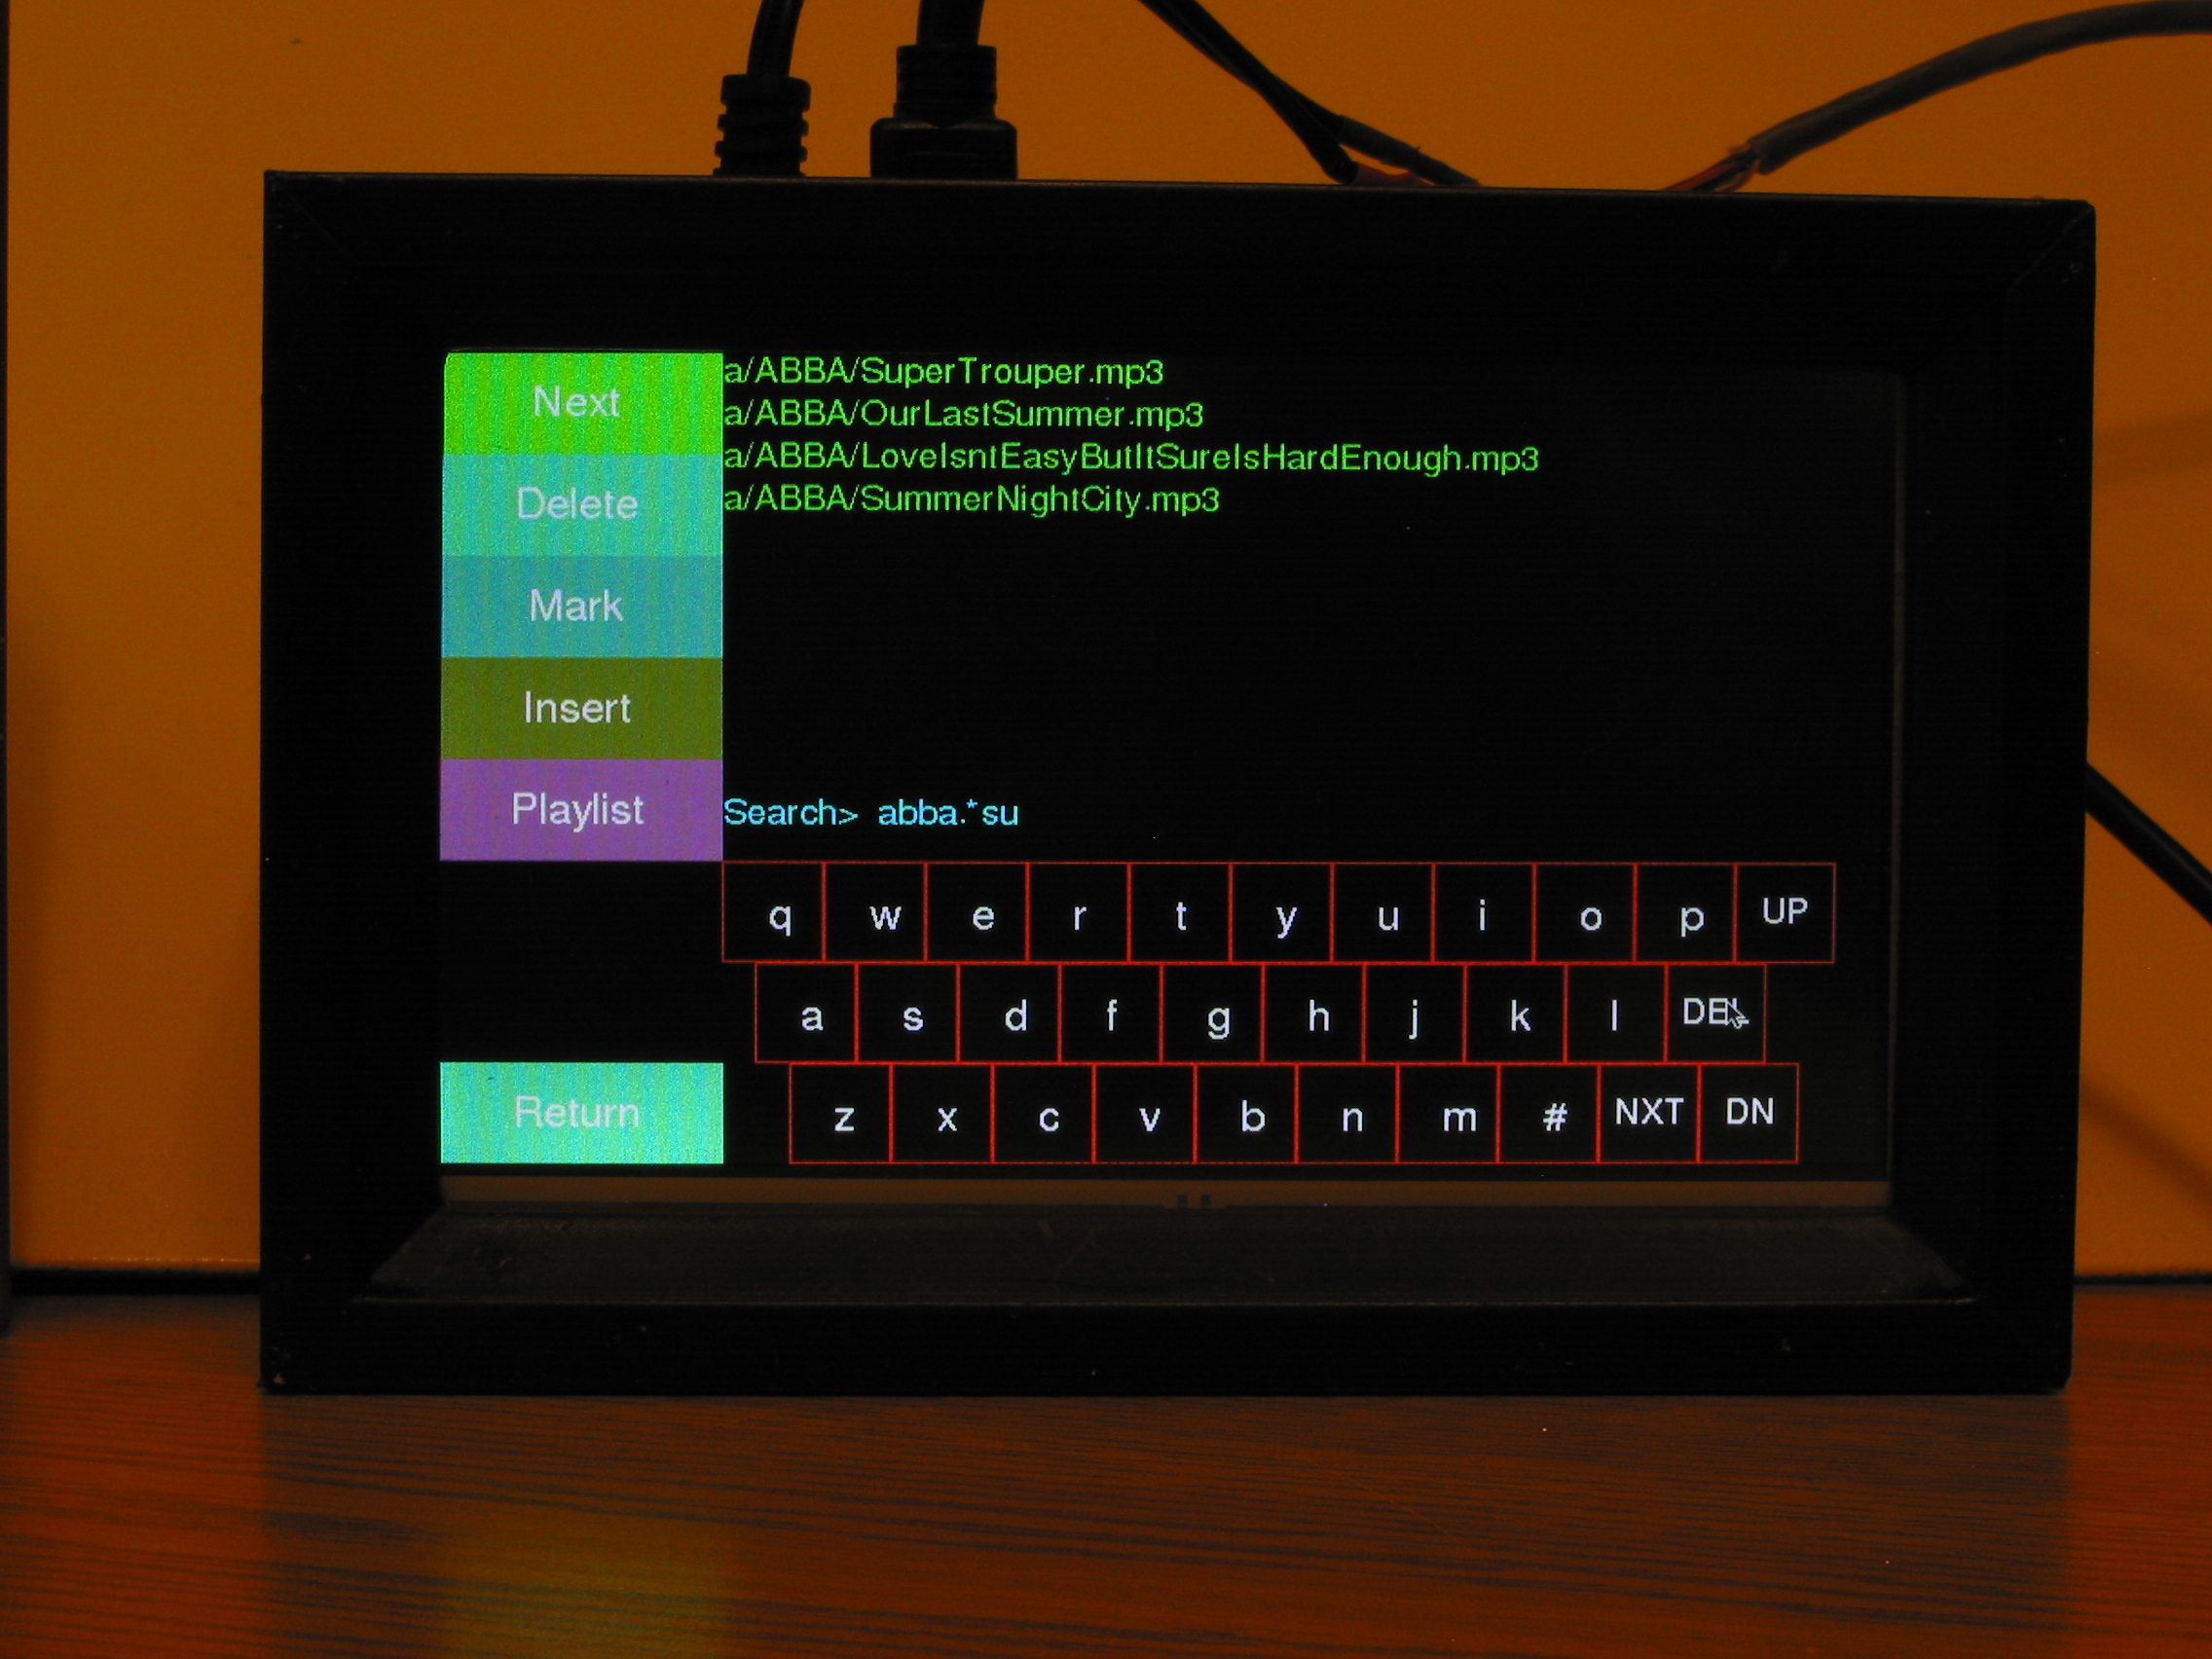
Here you can see a simple QWERTY keyboard “widget” and a partial search pattern. As you type characters, the search narrows down. After I had typed “abba,” the search had narrowed down to 80 entries (not just ABBA, but also BlackSabbath, LOL!)
Pressing the “NXT” button effectively drops “.*” into the regex search, and then as I typed “s” and then “u” the entries reduced from 80 to 45 to the 4 shown in the screenshot.
Of course, there are other menus.
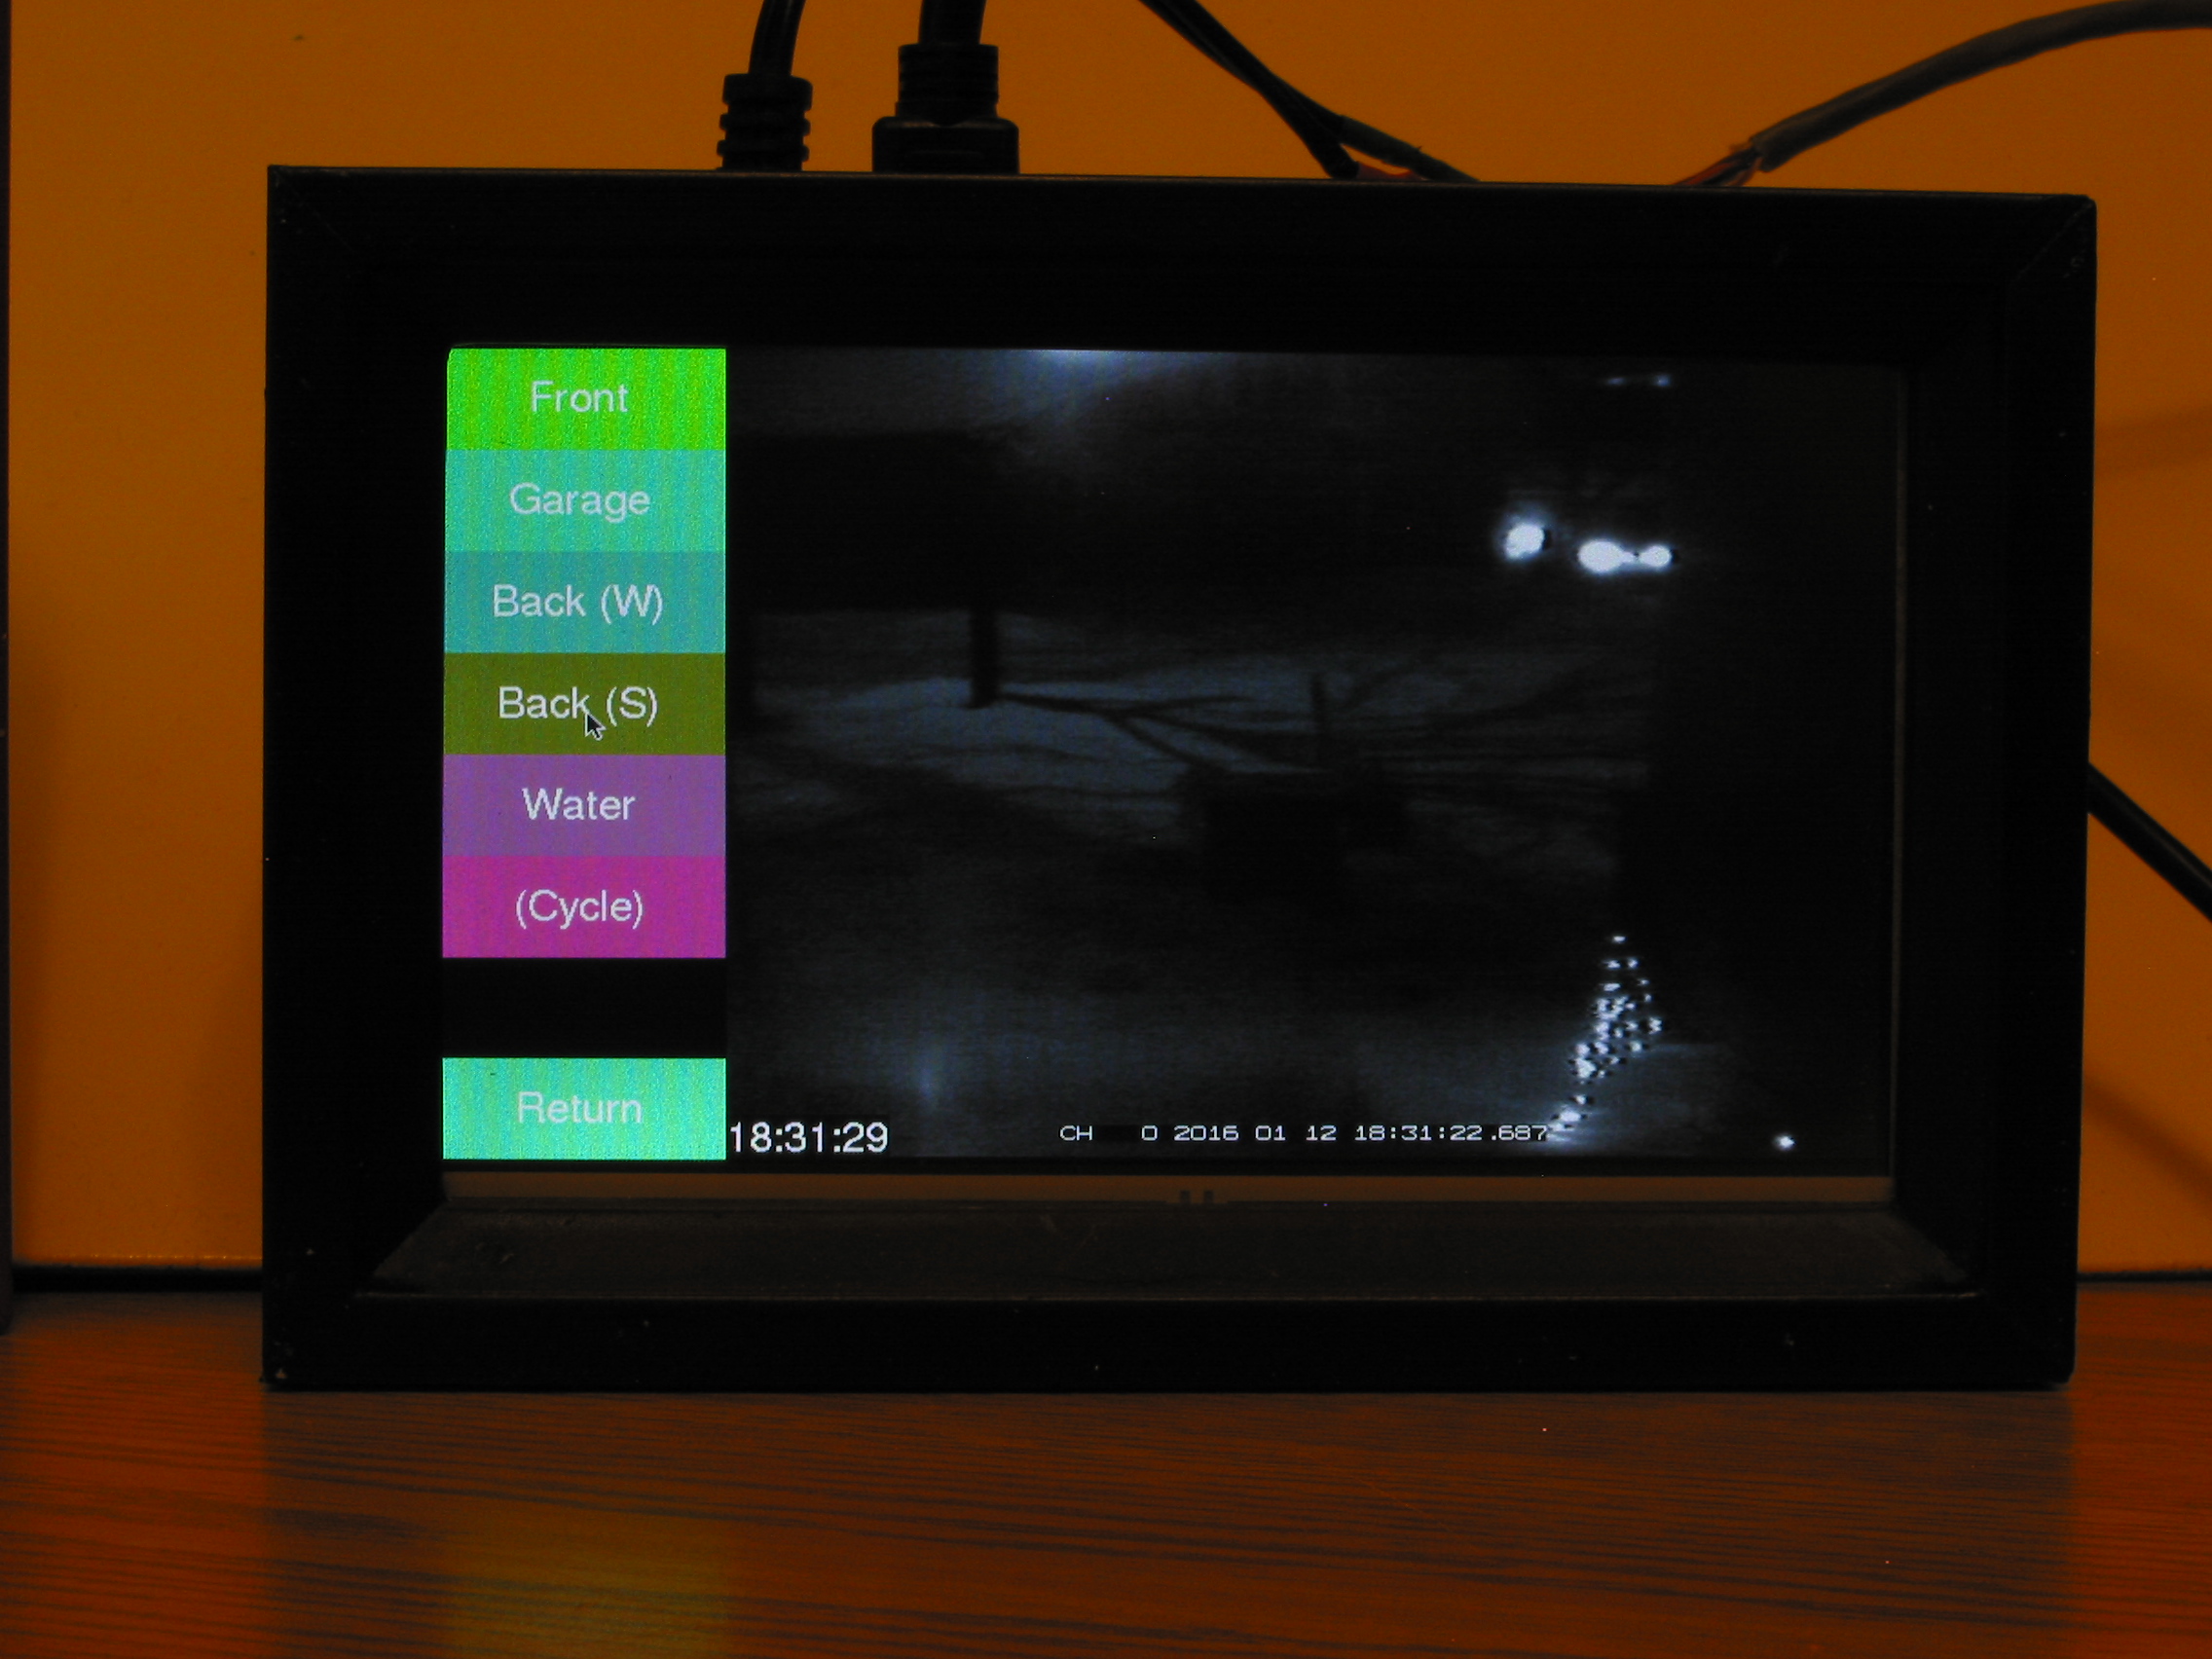
In the “Cameras” menu, pressing the “Front” menu item shows the front door cam:
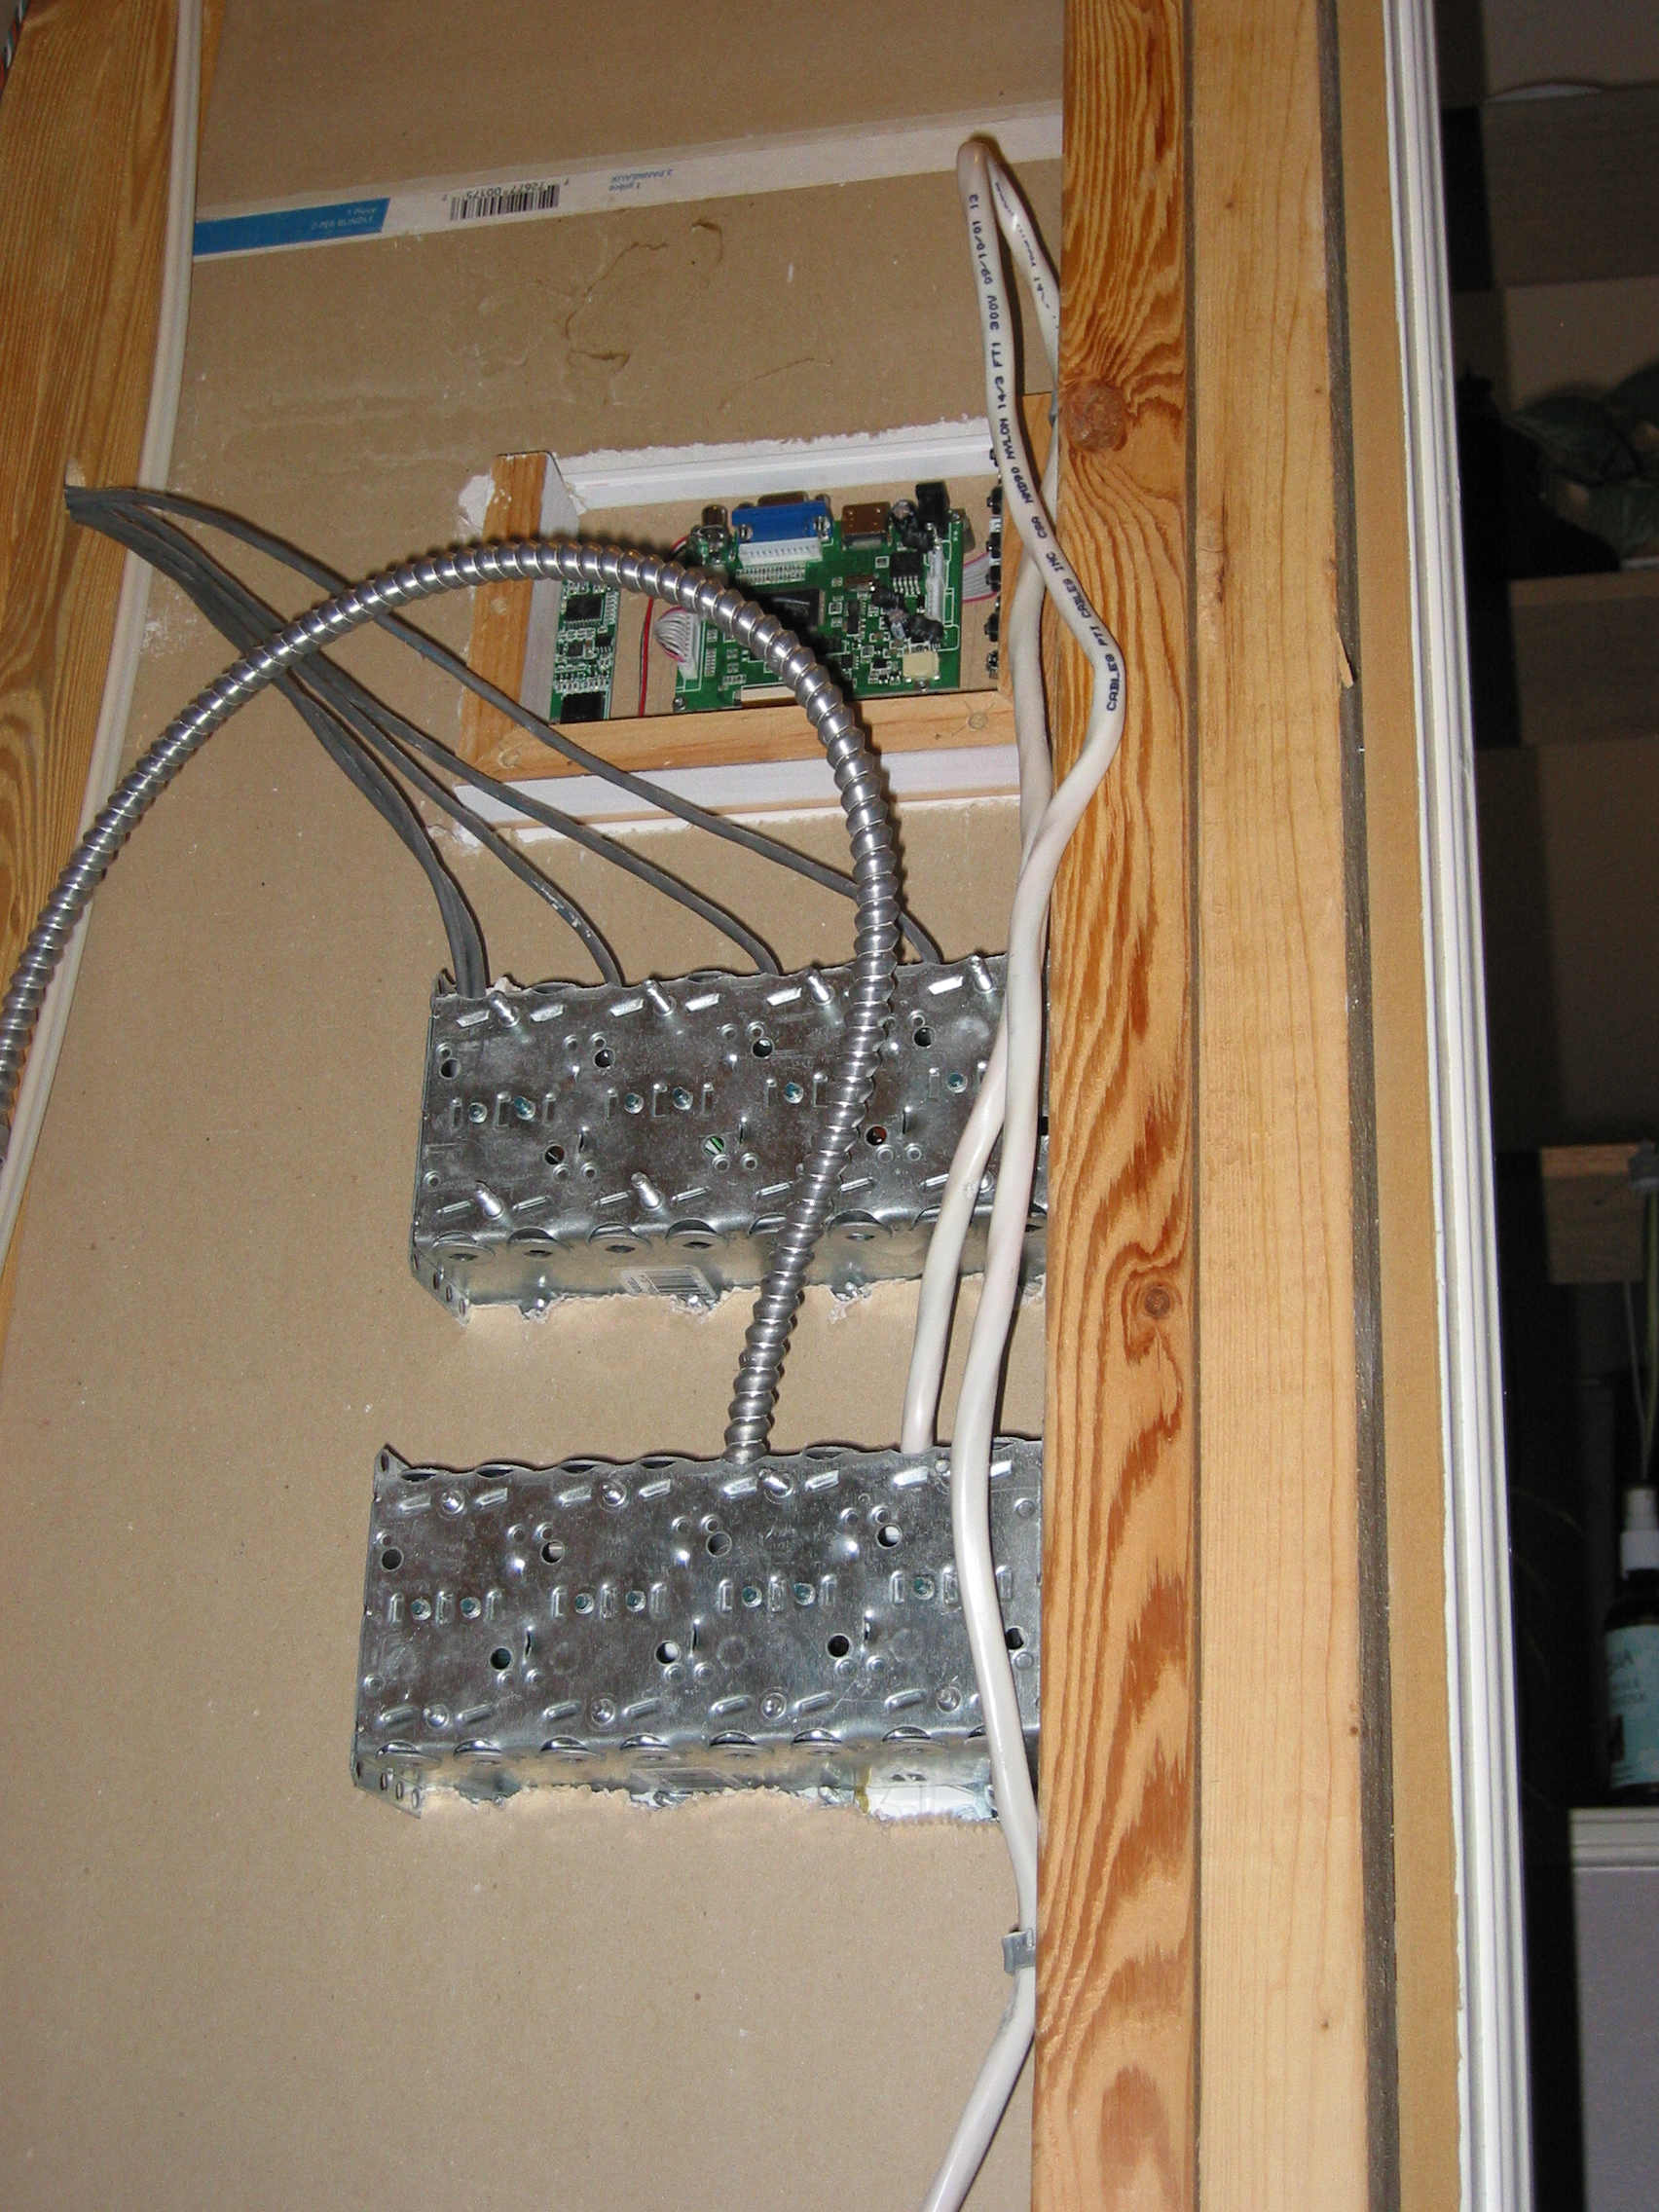
Installed!
And here it is, installed in the drywall:

The middle row of knobs is for 4 pairs of speakers throughout the premises. This functionality will be subsumed by the completed system — I'm thinking I2C controlled potentiometers.
And from the back — this was the easiest installation ever!
It's not connected up yet, but that's relatively easy.
The title of this is modeled after either the Blonde joke or the student newspaper (Carleton U). The blonde joke goes like this:
A man gets into an elevator, and there's a blonde there. She smiles, and greets him with “T G I F.”
The man smiles back, shakes his head, and says, “S H I T.”
The blonde looks a little confused, so she recites the letters again.
The man once again says, “S H I T.”
The blonde says, “Don't you get it? Thank Goodness It's Friday — T G I F!”
The man answers, “S H I T — Sorry Honey, It's Thursday!”
The Carleton University paper, The Charlatan, had a satirical section called “So Happy It's Thursday” which was most likely in response to the Ottawa Sun having a TGIF section. The logos of the two were almost identical. This goes back some number of decades.